Data exchange
Overview
This capability enables users to load data into ShareAspace and export data out of ShareAspace.
This section explains the processes involved in the data exchange module. The processes involves the following activities:
- Schedule import job
- Schedule export job
The Data Exchange module enables the user to schedule and coordinate long running tasks like imports and exports. This can be coordinated automatically by integration with for instance ERP/SAP-system or manually by the user in Data Exchange module. For technical information about the supported features, refer to Data exchange library.
The user can manually import and export files in the formats Excel, JSON and CAD. Starting an import or export starts by entering the Data Exchange Module:
![]()
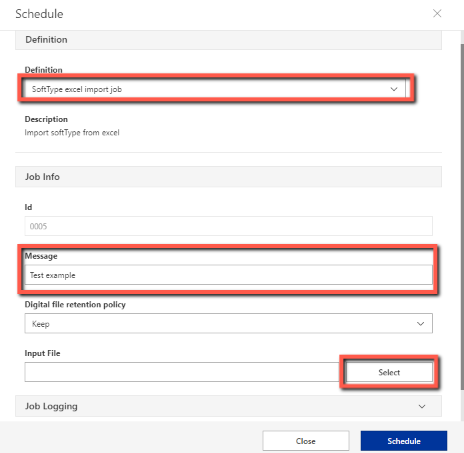
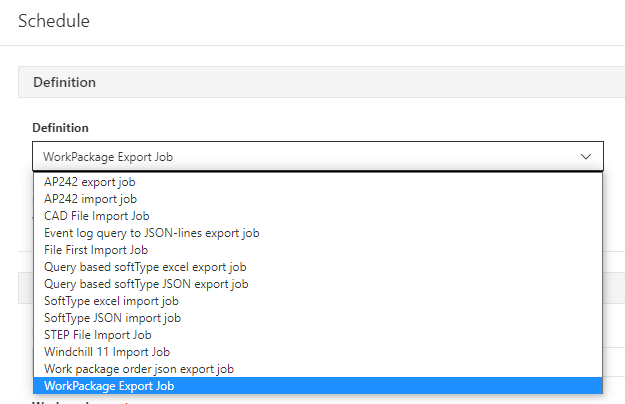
Clicking on Schedule opens the Schedule window. In the Definition dropdown menu the different jobs can be selected. The fields necessary to start the job will be updated depending on the selection:

Schedule import job
In this example, “Softtype excel import job” was selected and in the Message field “Test example” was written. Clicking on Select will open a new popup window where the user can upload the desired Excel import file:
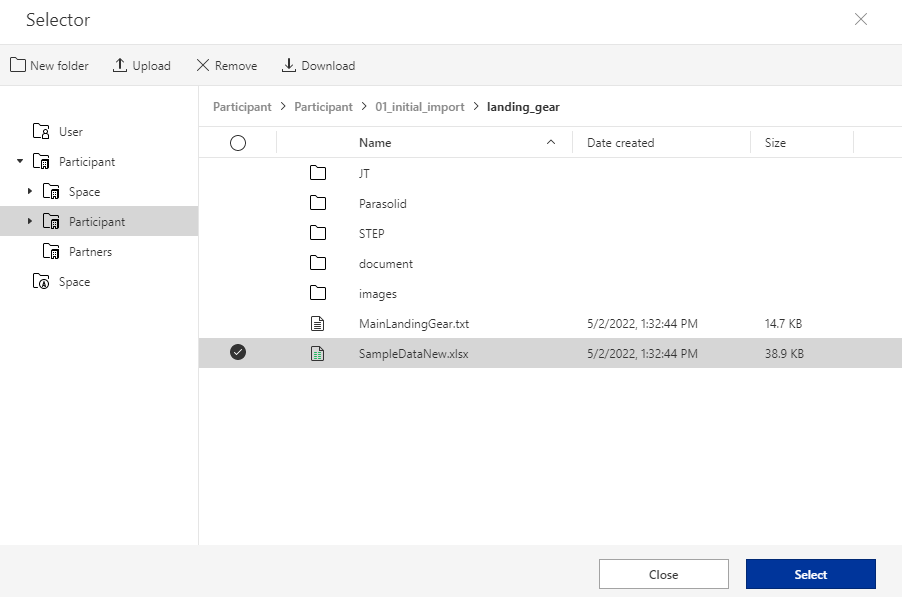
The user can either drag and drop a file from a local computer to the file area, or select and already uploaded file. Selecting the file and clicking on Select will close the popup window and select it as the input file:
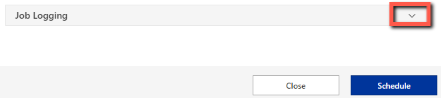
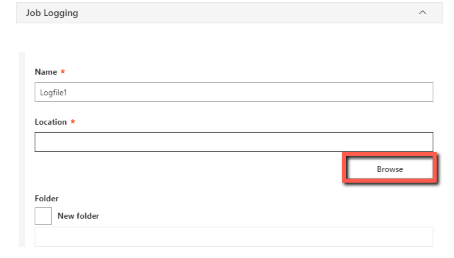
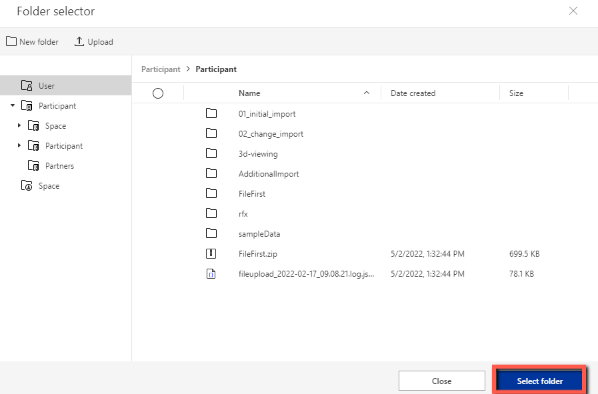
To enable the job logger, expand the Job Logging section, choose a Name for the log file and then select a Location for the log file by clicking Browse and choose folder:
To put the log file into a sub-folder of current Location check the "New folder" checkbox and write the Folder name:
Then, click on Schedule Job to start the job:

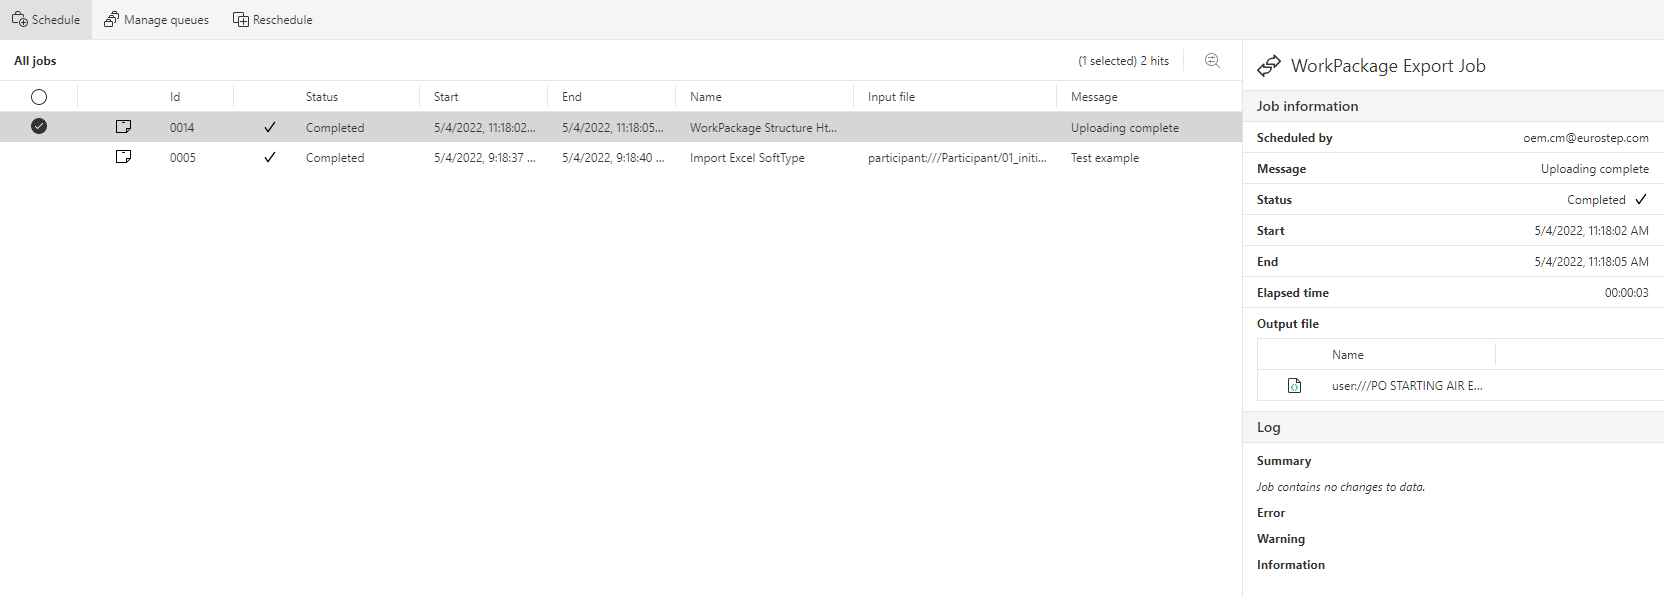
Selecting Schedule will start the job and it will be visible in the job queue. The Data exchange window will not automatically update after the job has started. To see if it has completed the view need to be reloaded. Easiest is to press All jobs in the right column. When finished it will show status Completed if successful. Detailed information about the job can be found on the right panel:

Schedule export job
Starting an export job follows the same structure as with the import. To run an export job, start by clicking on Schedule and then selecting in the Type dropdown. In this example, “WorkPackage Order Export” was chosen:
Search for the Work package order in the “Work packages” field and select it:

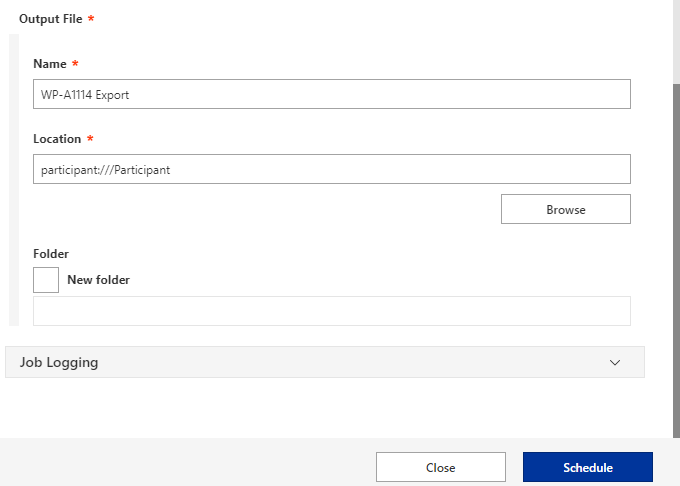
Typing in the name of the export file and then selecting the location by clicking on Browse. This is the folder that the file will be uploaded to once successfully run. Clicking on Schedule will start the export:
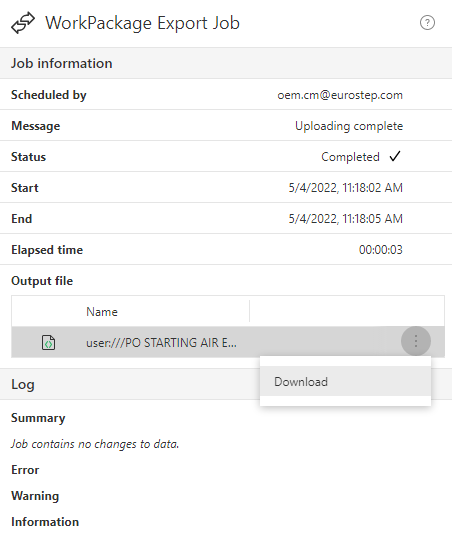
The Data exchange window will not automatically update after the job has started. To see if it has completed the view need to be reloaded. Easiest is to press All jobs in the right column. When finished it will show status Completed if successful. Detailed information about the job can be found on the right panel:
The file can also be downloaded directly from the Data Exchange module by hovering over the file in the “Output file”, clicking on the “Three dots” icon and then selecting “Download”: